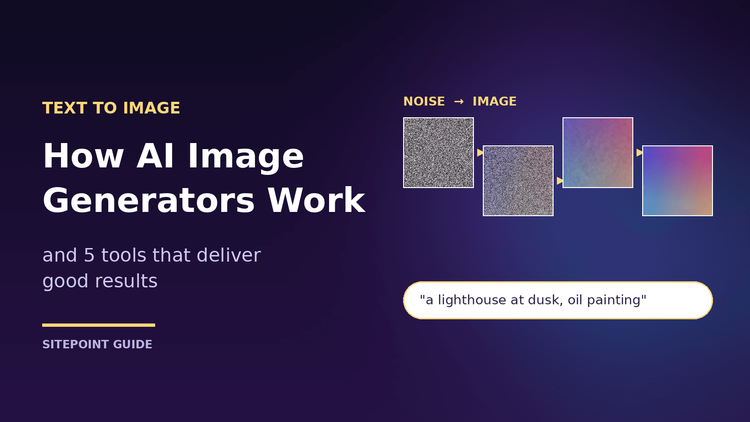
Type “a lighthouse on a cliff at dusk, oil painting, warm light” into a text box, wait ten seconds, and a picture that never existed appears. It feels like magic, but it is a well-understood pipeline of language models, neural networks and a great deal of math. Knowing how that pipeline works makes you a better prompter, helps you diagnose bad results, and makes it easier to choose the right tool for a job.
This guide explains how text-to-image generators turn words into pixels, why they fail in predictable ways, and how to write prompts that work with the model instead of against it. It then compares five tools that consistently produce good results, starting with Pollo AI, and finishes with a practical workflow, a troubleshooting table and an FAQ. Plans, credits and model versions change often, so confirm current details on each vendor’s site before you commit to a subscription.
Key Takeaways
- Text becomes numbers first. A language encoder converts your prompt into vectors that steer the image model at every step.
- Most modern generators use diffusion. They start from random noise and remove it step by step until an image matching the prompt emerges.
- Prompts are instructions for a statistical model. Subject, setting, style, lighting and constraints give it concrete signals to follow.
- Failures follow patterns. Hands, small text and crowded prompts fail because of how the model learns, not because of bad luck.
- No single tool wins everywhere. Some are best for speed and variety, others for artistic style, legible text, control or commercial confidence.
- Check the licence. Usage rights differ by tool and plan, and you remain responsible for how you use the output.
A Short History: From GANs to Diffusion
Early image generators were mostly GANs, or generative adversarial networks. A GAN pits two networks against each other: a generator that produces images and a discriminator that tries to spot fakes. GANs could produce sharp faces and textures, but they were hard to train, often collapsed into repeating the same few outputs, and were poor at following free-form text.
A second line of research used autoregressive models, which generate an image piece by piece the way a language model generates words. These handled text prompts better but were slow at high resolution.
The shift came with diffusion models. Researchers showed that a network trained to reverse a gradual noising process could generate images with excellent quality and diversity, and that it was far more stable to train than a GAN. Combine that with text conditioning and a compressed image representation, and you get the systems behind most of today’s tools. Newer models increasingly swap the traditional convolutional network for transformers, but the core idea of iterative denoising is still the foundation.
| Approach | How it generates | Strength | Weakness |
|---|---|---|---|
| GAN | One pass from a generator, judged by a discriminator | Fast, sharp images | Unstable training, limited text control |
| Autoregressive | Builds the image piece by piece | Good text understanding | Slow at high resolution |
| Diffusion | Removes noise over many steps | Quality, variety, stable training | Needs many steps, so more compute per image |
How Text-to-Image Generators Work, Step by Step
Under the hood, mainstream generators combine three ideas: a way to understand text, a way to represent images compactly, and a way to generate them gradually. The sections below follow a prompt from keystroke to finished picture.
Step 1: Tokenizing and encoding the prompt
Neural networks cannot read words, so your prompt is first split into tokens, small chunks of text such as whole words or word fragments. A text encoder then converts those tokens into an embedding, a grid of numbers that captures meaning and context. Many systems use encoders trained jointly on images and their captions, so that the text “a red bicycle” and pictures of red bicycles end up close together in the same mathematical space. Some newer systems add a large language model to understand longer, more detailed instructions.
This is why wording matters. The encoder only sees what you wrote, and it has a limited capacity. A short, specific prompt produces a clear signal. A long, rambling one dilutes each instruction.
Step 2: Starting from random noise
Instead of drawing on a blank canvas, the model begins with random static. The pattern of that static is controlled by a seed number. The same prompt with a different seed gives a different image, because it starts from different noise. If a tool lets you fix the seed, you can make results repeatable and change just one variable at a time.
Step 3: Learning to remove noise
During training, engineers take millions of real images and add noise to them in small steps until only static remains. The network is then trained to predict the noise that was added at each step, which teaches it to reverse the process. At generation time, the model applies that skill to pure noise, removing a little at each step. Because it has learned what real images look like, the “noise” it removes gradually reveals something that looks plausible.
Step 4: Steering the denoising with your text
Your text embedding is fed into the network through a mechanism called cross-attention. At each step, parts of the evolving image can “look at” relevant parts of the prompt and adjust accordingly. A region that will become a lighthouse attends to the word “lighthouse”. A region that will become the sky attends to “dusk”.
A setting called classifier-free guidance, often shown as guidance scale or prompt strength, controls how strongly each step is pulled toward the prompt. The model computes one prediction with the prompt and one without it, then exaggerates the difference. A low value gives the model freedom and often more natural, varied results. A high value follows the words more literally but can produce oversaturated, over-sharpened or distorted images.
Step 5: Working in a latent space
Running diffusion directly on full-resolution pixels would be very expensive. The idea behind Stable Diffusion, known as latent diffusion, is to compress images into a much smaller latent representation using an autoencoder. Denoising happens in that compact space, and a decoder turns the final latent back into a full image. This is a major reason high-quality generation now runs in seconds on a cloud GPU instead of minutes.
Step 6: Sampling steps, schedulers and refinement
The number of denoising steps and the scheduler, which decides how much noise to remove at each step, shape the speed and look of the result. More steps usually add detail up to a point, then give diminishing returns. Many tools hide these settings, but the trade-off is always the same: fewer steps are faster and cheaper, more steps can look more refined.
Most pipelines finish with an upscaler or refinement pass that sharpens detail and fixes small artifacts. Many tools also offer inpainting, which regenerates only a selected region, outpainting, which extends the canvas, and variations, which restart from a related image.
| Stage | What happens | Why it matters to you |
|---|---|---|
| Tokenizing and encoding | Prompt becomes an embedding | Clear, specific wording gives a stronger signal |
| Noise start | A seed sets the starting static | Same prompt and seed can reproduce a result |
| Guided denoising | Steps remove noise toward the prompt | Guidance scale trades freedom for literalness |
| Latent decoding | Compact latent is turned into pixels | Enables fast, high-quality output |
| Upscaling and edits | Image is sharpened or partly regenerated | Final resolution and fixes depend on this stage |
What the Model Learned From: Training Data
A generator can only produce what it has learned to represent. Models are trained on very large collections of images paired with captions, and the quality, diversity and licensing of that data affect both the output and the legal picture. Models trained on more photographs tend to produce convincing photorealism. Models tuned on illustration and concept art lean toward painterly looks.
This also explains a few behaviors. Common subjects look great because the model has seen thousands of examples. Rare or very specific subjects, such as an unusual machine part or a niche cultural item, often look generic or wrong. Biases in the data can show up as stereotypes, for example in how “a doctor” or “a CEO” is depicted, so it helps to describe the people and setting you actually want.
Why Results Sometimes Go Wrong
Understanding the process explains the familiar failures:
- Hands, teeth and counting errors. The model learns the statistical appearance of things, not anatomy or arithmetic. Repeated small structures such as fingers are easy to get slightly wrong.
- Garbled text. Letters are tiny, precise shapes that many models treat as texture. Tools trained with text rendering in mind, such as Ideogram, do noticeably better.
- Ignored details in long prompts. The encoder compresses everything into a limited representation, so a crowded prompt dilutes each instruction.
- Style drift. Without a clear style anchor, the model falls back on the most common look for your subject.
- Wrong spatial relationships. “A red cube on top of a blue sphere, left of a green cone” is hard, because attention does not enforce exact geometry.
- Merged or duplicated objects. When two concepts are close together in the prompt, the model may blend them into one.
What Makes a Good Text-to-Image Tool
- Prompt adherence: does the image contain what you asked for, in the right arrangement?
- Image quality: realistic lighting, clean edges, consistent detail and believable anatomy.
- Style range: can it move from photorealism to illustration without fighting you?
- Control: aspect ratios, style options, reference images, seeds, editing and variations.
- Speed and cost: how quickly you can iterate and what each image costs.
- Licensing and safety: what you may do with the output, especially for client work.
- Ecosystem: whether you can move from images to video, editing or design tools without starting over.
5 Text-to-Image AI Tools Worth Trying
1. Pollo Ai
Pollo AI’s text to image AI is a browser-based generator built around a simple loop: write a prompt, pick a style, generate, and download. Its page highlights HD output and a wide range of looks, from photorealistic scenes to cute cartoons, anime, pencil sketches, isometric art, abstract compositions and surreal visuals. Files can be downloaded as WebP, PNG or JPEG, a practical spread for web work: WebP keeps pages light, PNG preserves clean edges and transparency-friendly graphics, and JPEG works almost everywhere.
Pollo is also part of a wider platform that covers AI video, so a still image you like can become the starting point for motion without switching ecosystems. That matters for teams producing social content, because one workflow can cover both the image and the short clip built from it.
How to get the most from it:
- Start with a style word that matches your goal, such as “isometric illustration” or “photorealistic”, then describe the subject.
- Generate several variations of one prompt and compare them before editing the wording.
- Pick the download format by use: WebP for web pages, PNG for graphics, JPEG for broad compatibility.
Things to check: the page does not list specific model names or credit amounts, so review the current plan details before relying on it for high-volume work. Commercial use requires a paid plan.
Best for: quick, versatile image generation across many styles, especially if you also plan to make video.
2. Midjourney
Midjourney has built its reputation on strong aesthetics. Images tend to arrive with polished composition, dramatic lighting and a distinctive painterly feel, which is why it is popular for concept art, mood boards, album-style visuals and editorial illustration. It offers style references and personalization, so you can steer results toward a consistent look across a project. It also supports editing and variation tools for refining a chosen image.
The trade-offs are practical. It is a paid service, and its prompts reward experimentation over literal instruction following, so you sometimes get something beautiful that is not exactly what you described.
Best for: artistic, high-impact visuals where mood matters more than exact specification.
3. Adobe Firefly
Adobe Firefly focuses on professional workflows and commercial confidence. Adobe describes Firefly’s own models as trained on licensed content such as Adobe Stock and public-domain material, and it attaches Content Credentials metadata that records AI involvement. It connects with tools many teams already use, including Photoshop features like generative fill and generative expand, which suits designers who edit as much as they generate.
Firefly also provides controls such as style and composition references. Its results can feel cleaner and more commercial than Midjourney’s, which is an advantage for marketing assets and a limitation if you want a wild artistic look.
Best for: marketing and design teams that need editing tools and clearer licensing.
4. Ideogram
Ideogram is known for rendering legible text inside images, a task where many generators struggle. That makes it a strong choice for posters, social graphics, logo concepts, packaging mockups and product visuals that need a headline or short phrase to read correctly. It also offers style controls and a community gallery that doubles as a prompt library.
Even so, long paragraphs of on-image text can still go wrong. Keep the copy to a few words, put it in quotation marks in the prompt, and describe the lettering style.
Best for: graphics that combine imagery with short, readable text.
5. Leonardo AI
Leonardo AI is built for creators who want more control. It offers multiple models, fine-tuning options, image-to-image guidance and a canvas for editing, with a particular following among game artists and designers who need consistent characters and assets. Features such as reference-based generation help keep a character recognizable across many scenes.
The wide set of options is powerful but means a steeper learning curve than a one-box generator, and credit systems can take time to understand.
Best for: consistent characters, game and concept assets, and users who like tuning settings.
Side-by-side comparison
| Tool | Standout strength | Typical use | Watch out for |
|---|---|---|---|
| Pollo AI | Many styles, multiple download formats, video-ready platform | General images and image-to-video workflows | Model and credit details not listed on the page |
| Midjourney | Distinctive, polished aesthetics | Concept art, mood boards | Paid access, less literal prompting |
| Adobe Firefly | Licensed-content positioning, Adobe integration | Commercial design work | Style can feel cleaner than artistic |
| Ideogram | Legible text in images | Posters, social graphics | Long text can still fail |
| Leonardo AI | Control, models and canvas editing | Game and character assets | Steeper learning curve |
Which tool should you choose?
- You want fast, flexible images and possibly video: start with Pollo AI.
- You want striking, artistic results: try Midjourney.
- You work in Adobe tools or need commercial confidence: use Firefly.
- Your image needs readable words: use Ideogram.
- You need the same character across many images: use Leonardo AI.
How to Write Better Prompts
A reliable prompt has five parts. Put the most important part first, because it often carries the most weight.
- Subject: what is in the picture, with one or two defining details.
- Setting: where and when it happens.
- Style: photograph, watercolor, 3D render, flat vector, anime.
- Lighting and camera: soft window light, golden hour, wide-angle, shallow depth of field.
- Constraints: aspect ratio and anything to avoid.
Compare weak prompts with stronger ones:
| Weak prompt | Stronger prompt |
|---|---|
| A coffee shop | A cozy independent coffee shop interior at golden hour, wooden counter, steam rising from a ceramic cup, warm natural light, shallow depth of field, photorealistic, 3:2 |
| A logo for a bakery | Minimal flat vector logo concept for a bakery, a wheat stalk inside a circle, two-color palette of cream and brown, clean lines, white background |
| A futuristic city | Isometric illustration of a futuristic city block with glass towers and elevated walkways, soft pastel colors, clean shadows, white background |
Prompting habits that work
- Be concrete. “A golden retriever puppy sitting on a wooden porch” beats “a cute dog”.
- Name the medium. “Watercolor”, “35mm photograph” and “vector illustration” change the whole look.
- Describe light. Lighting is one of the cheapest ways to improve realism and mood.
- Say what to avoid. Where a tool supports negative prompts, list unwanted elements such as “blurry, extra fingers, watermark”.
- Change one thing at a time. If you rewrite the whole prompt after every attempt, you will never learn which change helped.
- Keep a prompt log. Save prompts that worked, so you can reuse the structure.
A Practical Workflow for Reliable Results
- Define the use first. Decide the aspect ratio, where the image will appear and whether it needs text.
- Draft quickly. Generate several low-effort variations to find a direction.
- Refine the winner. Add detail to the prompt, fix the seed if possible and change one variable per run.
- Fix problems locally. Use inpainting or an editor for hands, text and small errors instead of regenerating everything.
- Upscale and export. Choose the format for the destination.
- Review before publishing. Zoom in, check for artifacts and confirm the licence.
Troubleshooting Common Problems
| Problem | Likely cause | What to try |
|---|---|---|
| Wrong subject or missing objects | Prompt too long or vague | Shorten it, put the main subject first |
| Distorted hands or faces | Model weakness with fine anatomy | Inpaint the area or regenerate with a simpler pose |
| Garbled text | Tool not strong at lettering | Use a text-focused tool or add text in an editor |
| Plastic, over-sharpened look | Guidance too high | Lower prompt strength or add “natural” lighting cues |
| Inconsistent style across images | No style anchor | Reuse the same style words, seed or a reference image |
| Generic result | Prompt too broad | Add setting, lighting and specific details |
Using AI Images Responsibly
- Read the licence. Free and paid plans can have different commercial rights.
- Avoid real people and protected characters. Do not generate likenesses of real individuals without permission or imitate living artists’ work.
- Disclose when it matters. For editorial and client work, say that an image is AI-generated.
- Add alt text. Describe what the image shows, for accessibility and search.
- Check for artifacts. Zoom in on hands, text and edges before publishing.
- Mind bias. Review images of people for stereotypes and adjust your prompt.
FAQ
How do text-to-image generators work? They convert your prompt into a numerical representation, then use a diffusion model to remove noise from a random starting image step by step, guided by that representation, until a matching picture appears.
Which text-to-image tool is best? It depends on the job. Pollo AI suits fast, varied generation, Midjourney suits artistic work, Adobe Firefly suits commercial design, Ideogram suits images with text and Leonardo AI suits tuned, consistent assets.
Why does the same prompt give different results? Each run starts from a different random seed. Fixing the seed, where a tool allows it, makes results more repeatable.
Can I use AI-generated images commercially? Often yes, but the rules differ by tool and plan. Pollo, for example, notes that commercial use requires a paid plan. Always check the current terms.
How do I get readable text in an AI image? Use a tool strong at text, keep the wording to a few words, and add the text in a design editor if accuracy is critical.
What file format should I download? WebP for lightweight web pages, PNG for graphics and sharp edges, JPEG for broad compatibility.
Can I turn a generated image into a video? Many platforms support it. Pollo AI, for example, also covers AI video, so you can move from a still to motion in one place.
Conclusion
Text-to-image generators work by turning language into numbers and using those numbers to guide a model that denoises random static into a picture. Once you understand that, prompts stop being guesswork: you give the model a clear subject, style and lighting, you iterate one change at a time, and you fix small flaws locally. Start with a versatile option such as Pollo AI, then add Midjourney, Firefly, Ideogram or Leonardo when a project needs their particular strengths.